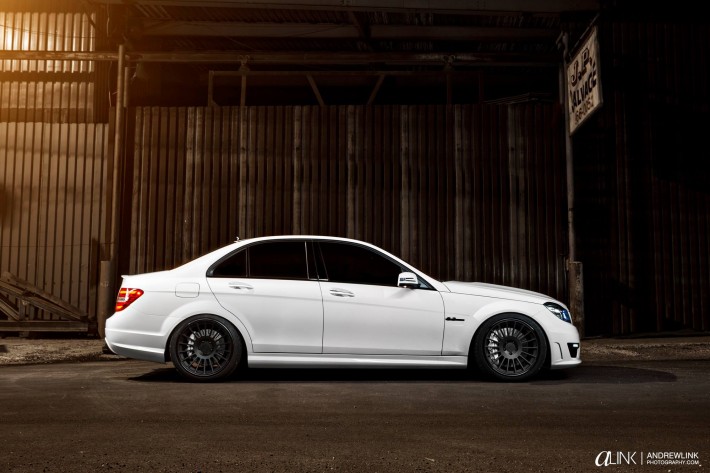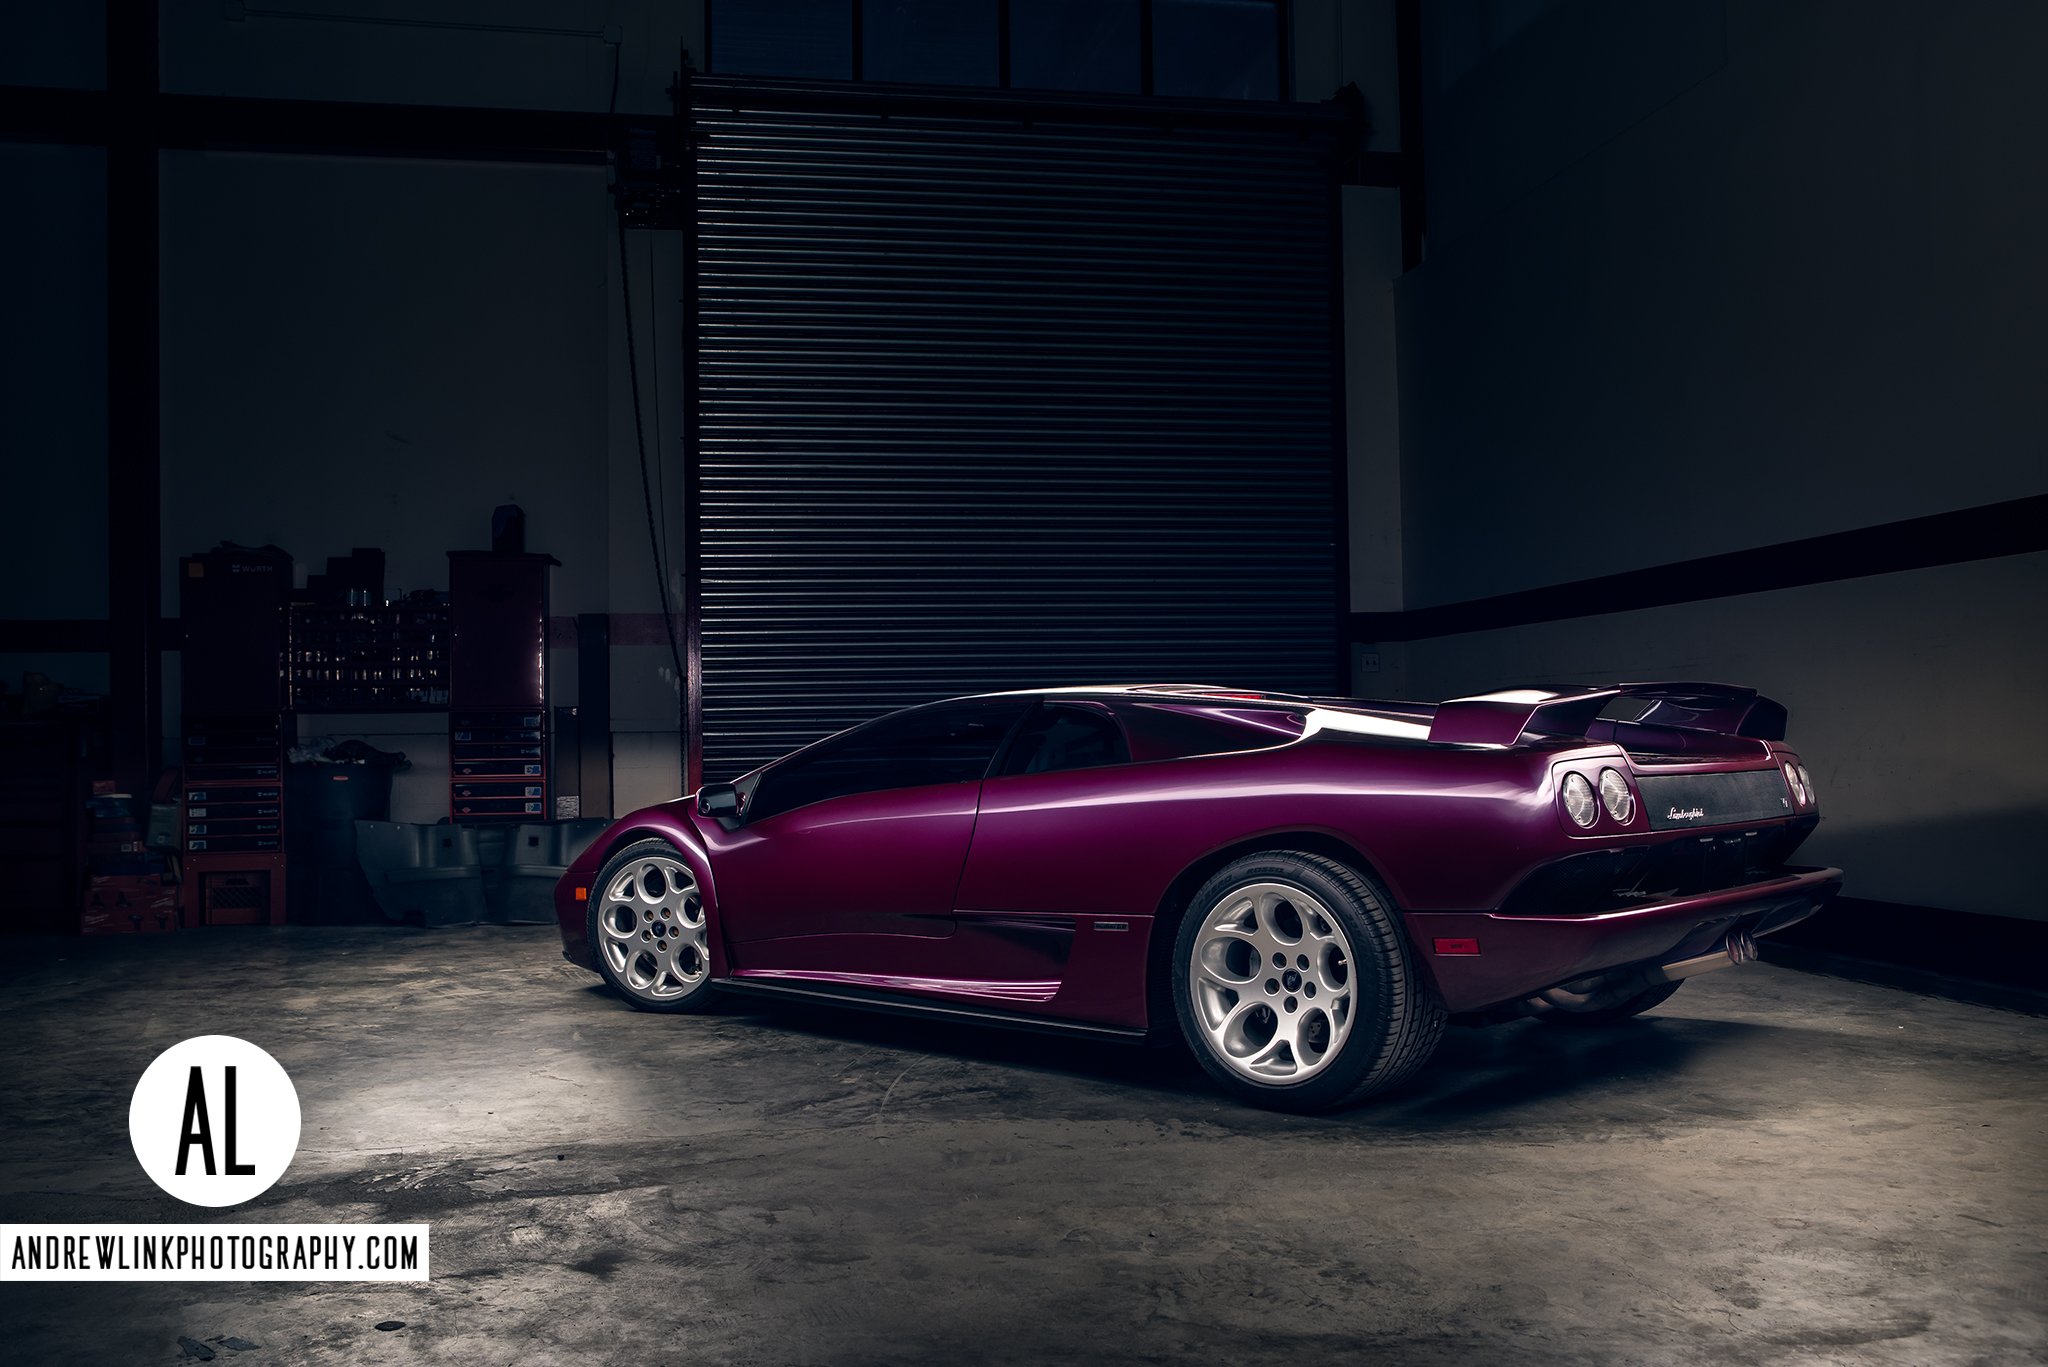
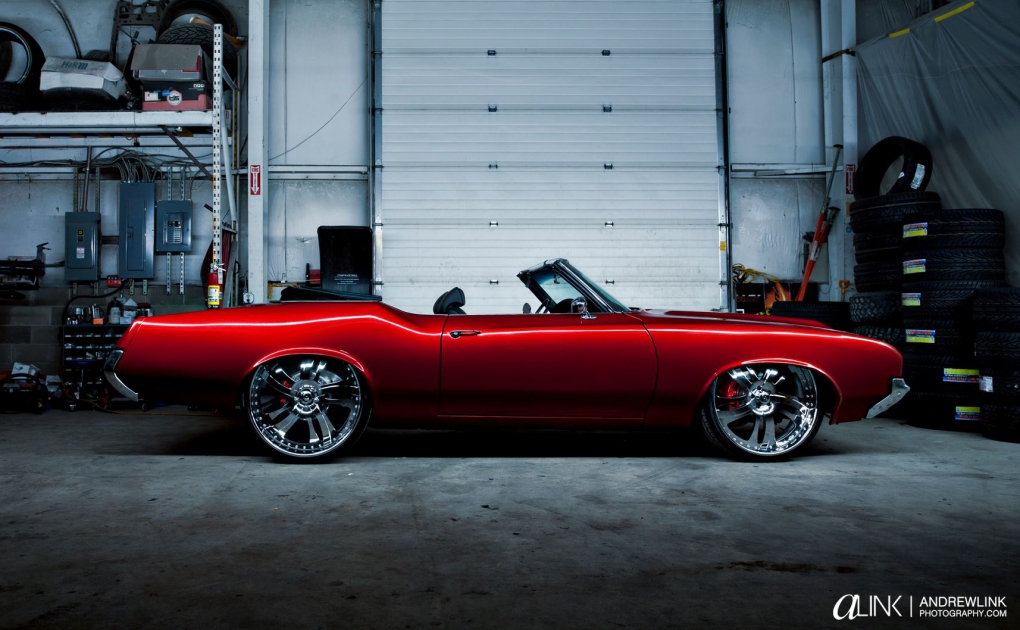
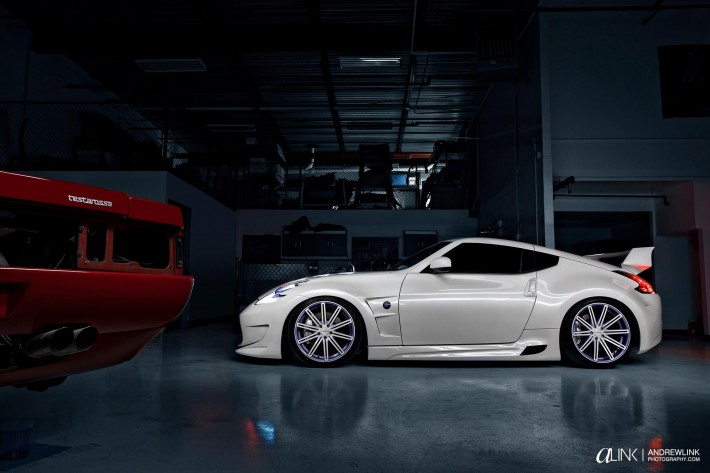
When people think of high end commercial automotive photography, they’ll sometimes call to mind images of cars with that distinct light streak down the side. That light streak that so many automotive photographers lust after is actually not a product of black magic, as it seems to be when you’re starting out, but actually incredibly easy to replicate with a technique called light painting. This guide to automotive light painting will hopefully put you on the right track towards achieving high end results in your images.
As an automotive editorial photographer for the last 7 years, I’ve adopted and developed many techniques to help me adapt to each and every situation I can be dropped into. I adopted light painting for a few reasons, one of which being it’s speed. Once you’ve gotten the hang of it, light painting can be done fairly quickly, which helps me get car owners back on their way. Also, it allows me another option for shooting at night and involves taking less gear in the event I can’t cart my whole location case full of strobes with me.
To light paint you’re going to need a tripod and a light source, almost any constant light will do. I personally use a Westcott Icelight, but I’ve been known to experiment. I’ve even used the LED on the back of an iPhone while covering the GUMBALL 3000 Rally. You’ll also need some darkness. The reason it’s done in the dark is because you’ll need a long exposure, (about 10 seconds or higher) to pull off the effect. You’re goal is to get at least an exposure of the ambient light in your background and a light painted exposure of your car, so make sure not to bump that tripod or your exposures will not line up properly in Photoshop later.
Start with your camera on a tripod and set to a long exposure, let’s say ISO 100, F8, 15 seconds. Trigger the camera and turn on your light, you’re literally going to walk around the car and bathe it in light. Having a friend to help will make it much easier, you’ll look through the viewfinder as your friend lifts the light up and down to see where the light is reflecting in the paint. You’ll usually want it to reflect along the body line of the car beneath its windows. Once you’ve found the proper height, you’ll keep the light moving at that height all the way around the car. After making a pass around the car that you’re satisfied with, it’s as simple as pasting the lit car into your background exposure, setting your blending mode to lighten, and masking out the excess. No black magic, just some simple Photoshop and some patience. The biggest immediate benefit you’ll notice with light painting is that your raw shots have a very surreal look to them before you get into any post production. Lots of shooters gravitate to this technique because it’s a very polished and clean look if done properly.
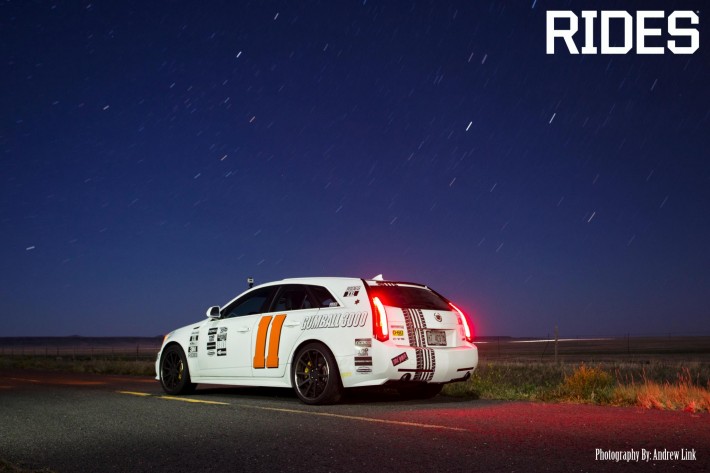
Above is the image shot on the GUMBALL 3000 Rally and lit by the LED of an iPhone. By downloading any free app that will turn your LED into a flashlight, you get an instant light painting source to be used in a pinch!